Tuesday, October 23, 2012

happy biRthday Rhonna!

I can never say it enough, that Rhonna is an amazing inspiRation! Not only as an artist but as a peRson she amazes me! Today is her biRthday and she is gifting to otheRs, #spreadthelove is what she is saying and how true is her message! Go read it HERE

I hope you will help us celebRate Rhonna and her message!
photo credit: Rhonna Designs

**Edited to include the following.


This morning on my way into the office I stopped in at my local Starbucks to get myself a coffee.  I decided this would be one of the places I would #spreadthelove in hopes that others would pay it forward somehow.  I simply printed out Rhonna's freebie found via link on her blog HERE and wrote a note on the back.  I added my blog addy so that maybe they would pull it up and find the link to Rhonna's fabulous message.   How will you #spreadthelove today or any other day? It doesn't have to be anything over the top to inspire others to bring joy in someones life.  And yes, coffee brings joy to my life, ha!

The above photo is from my Instagram feed, follow me @nct621

Thursday, October 18, 2012

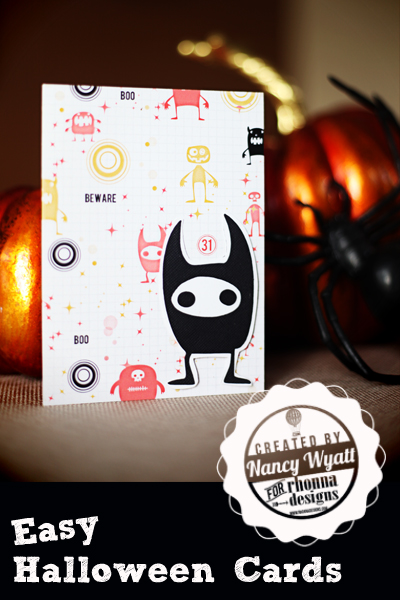
Halloween Cards Made Easy

Hello there!  Just wanted to share with you three very easy cards that I created using some of this years Spooky line.  And I do mean easy to make and I think they will appeal to those of you who don't have a ton of extra time to create really over the top cards.  Don't be afraid to make projects that are easy and quick.  Besides, sometimes less is more.

Above you can see how I simply printed out some of the backgrounds from the Spooky Printable Background Kit found HERE.  I did apply some of the printed paper to some store bought white cards that I had on hand so that they would be a little more rigid.  But you could easily print them on some heavy card stock and cut them to size. Then I simply decorated them with some other elements found HERE and HERE.
The BOOO piece was super easy to cut out using my Silhouette. I simply set it up via my Silhouette software and printed them with registration marks then fed them through the Silhouette.  Just think, you could cut out a whole page of these and easily create a large batch of cards easily and quickly!


The little monster that you see on the front of this card is from the kit HERE.  I simply opened the PNG file in Photoshop Elements and then erased all the elements but that monster.  Then I saved it as it's own special monster.png file for my files.  I then went into my Silhouette software and opened that file then did the print and cup like I did for my BOOOO's.  

If you have any questions please drop me a line and I will be glad to help out!  You can find my email address on the right sidebar of my blog.

Y'all get to creating some BOOOO'licious cards!


Tuesday, October 9, 2012

Halloween meets 7 Gypsies Artist Painter's Tray

Hi there!  Today I want to share with you the Halloween Artist Tray that I decorated with all things Rhonna Designs.  I love how easy it was to do and with very little effort, well once I designed the pieces that I would add.  For those of you with some PSE (Photoshop Elements) experience you too can create your own digital art using Rhonna's kits as the base.
After I created my art I then laid them out on two sheets so that when I printed them out I could cut them easily and quickly without wasting cardstock.  I printed out one of my pages twice so that I could cut out two elements to pop them up with adhesive pop ups.  Those pieces were the happy halloween at the top right corner and the danger piece.  That is on the second row second from the left, I could have left them one dimensional but chose to cut out part of those cards out and double them up for added dimension.
That little skull piece on the bottom left I cut out using my silhouette as well as the BOOOO piece on the second row.  I used the Print and Cut feature as shown in my tutorial HERE for the BOOO and for the skull I used the cutting PNG files in the tutorial shown HERE.

 
Above you can see that I added a little bottle to one of the pieces, that bottle is from the Tim Holtz line and I have been hoarding saving it since last year.  I simply filled it with some water and vanilla extract for some color and then glued it on with a glue dot.  I really love how it turned out and how fab it looks with last years line so that all my pieces compliment each other.  The hubby was quite impressed too!

Hope you are inspired to create something Spooky fun for your family.

The tray is by 7 Gypsies and can be bought at various places but I have located it at Amazon HERE on sale too.  Hmmmm, maybe I should order another one to have on hand, ha!

I used various Kits when designing these and they are:

And as Rhonna likes to say.....Now, let's go cReate!


Sunday, October 7, 2012

Using your Silhouette to cut out printed PNG files

Welcome back! Just a quick post to share with you my latest tutorials on how you can print then cut your fun and fab Rhonna Designs!

The Witches silhouette is from the Spooky Silhouettes Brush Kit which includes the files as .PNG files too so go HERE

The photo above shows what I used to cut in the tutorial.  I will then use some pop dots to apply it to that Spooky Backgrounds Printable.  Will look so cute in a frame, well with the glass removed of course.

Simply head on over to my Vimeo Channel located HERE to watch it.  And not to worry, you can always get to my Vimeo Channel by clicking on the link on my right side bar.  Or by searching for NancyWyatt on Vimeo.

Monday, October 1, 2012

Jack is on his way back...

...and I am getting our house ready for him!  I love decorating for Halloween, I don't see it as anything but a fun holiday that we celebrate eating candy, ha!  I love seeing all the little ones dressed up in their cute and usually not so scary outfits!  I am still working on some fun Halloween decorating ideas but here is a peek at some of my mantel. 

More to come I promise and as always please be sure to head over to Rhonna's blog where lots of great inspiration is shared.  Infact, she is counting down the days to her birthday with lots of inspiration.  Just click HERE to get there.  See ya back here soon!!
This is what I used to create the two hanging banners on the mantel.
I simply printed the following kit at 40% and 4 up on a sheet of Matte Presentation Paper
Spooky Junque Banner Kit

And look how easy they are to cut out! No fancy tools required, you could even just use scissors.

Then I printed out the following Kit, using the mini version included and trimmed the bottom so it would have a cute bunting shape.  And printed one out in full size 8x10 for the one in the frame from this same kit.
Spooky Frameables Kit

For the Bird, I simply printed out the png in a size I wanted and then hand cut it out and applied it to some black cardstock for stability. Super Easy!
Spooky Silhouettes Brush Kit