Showing posts with label Tim Holtz. Show all posts

Thursday, March 8, 2012

Quick and Easy Birthday Gift

Hi there!  I just wanted to share with you a little gift that I made for a co-worker of mine.  If you are a creative soul then your friends and family usually hope for a handmade gift (well most of them, ha). This is a little gift I created using some of Rhonna's "Follow Your Heart" line from My Mind's Eye.  My friend loved it and I was pretty pleased with it too! 

Click on photo to see it in a larger size.


Pin It
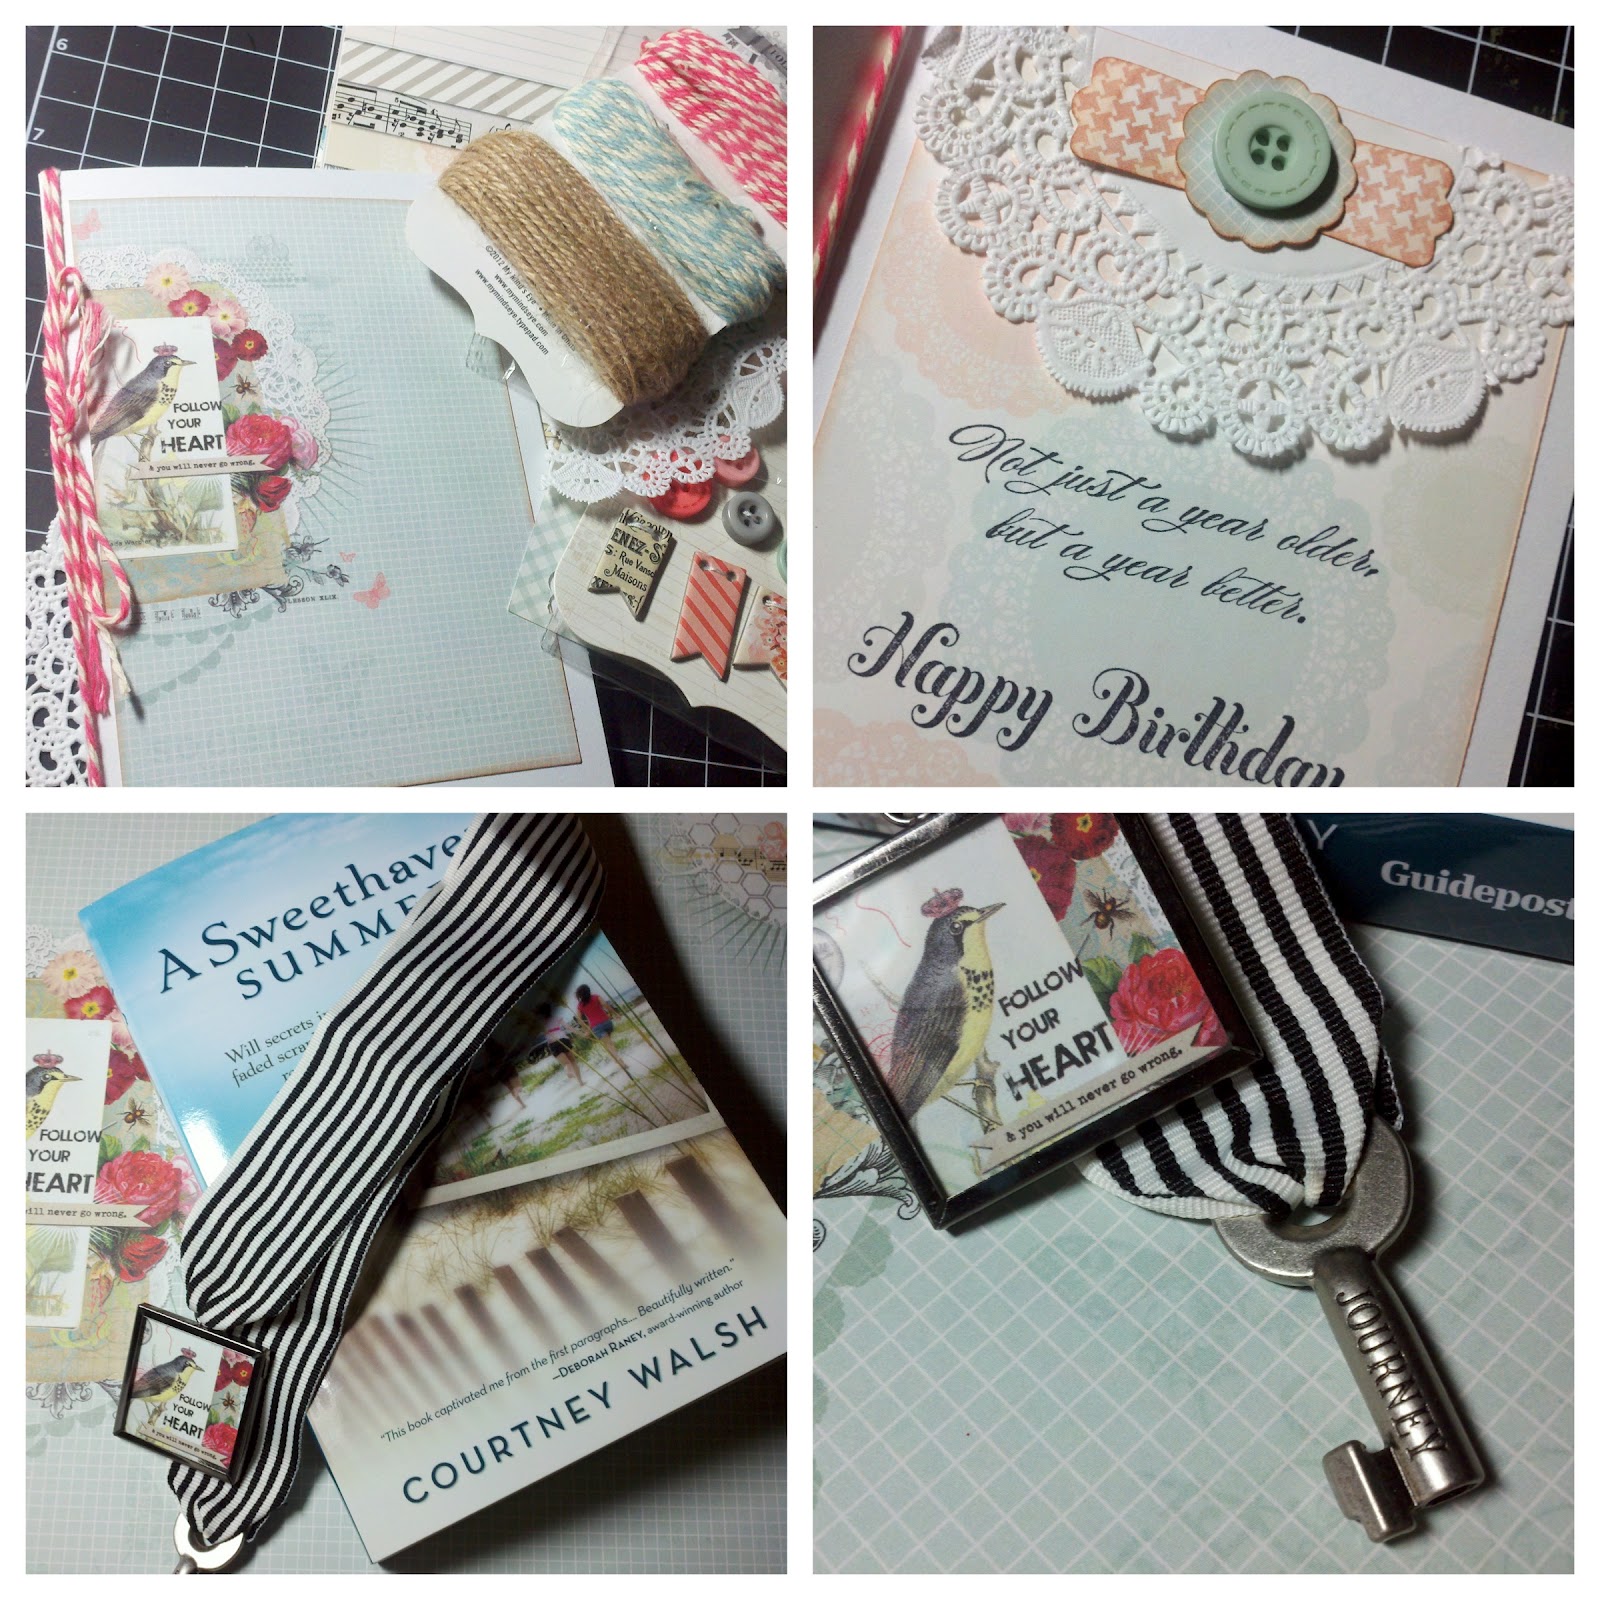
I have to say that the twine is absolutely delish! It's thicker than most that I have come across, I plan on going back to my LSS and stocking up on more!  The stamps that I used on the sentiment for the card are from Stampin' Up.  The ribbon used is from My Mind's Eye and I'm bummed that I don't have more as it was from last years line.  The key is from Tim Holtz, the frame and glass from Ranger.  It all came together very nicely and I must remember to do this again soon!

**How did I make the bookmark? Well, it was so easy! I simply fed the ribbon through the key then I folded the edge and hot glued it down all nice and tidy. Then I did the same thing with the frame, it has a eye ring so I just fed the ribbon through it and hold glued the ribbon down.  I had the sewing machine in arm's length but the glue gun was even easier :)  What you can't see is that on the backside of the frame is a cute monogram as the piece is double sided.

The book is fabulous and sadly for my friend not part of her gift, hehe.  But, you must look into buying yourself a copy or the e-book for Kindle.  You can see info for it on my post HERE as well as a free printable.

Thanks for stopping in!

Tuesday, February 7, 2012

One Little Word meets Rhonna Designs

Hello there! Well, I am still alive and kicking, ha!  I just had seemed to fall into a slump and getting my mojo back took some time and I'm still working on it!  I worked this past weekend on some fun things for submission to a Styled Wedding Shoot.  Once I get the photographers photos I will share them with you!

I finally had some time to finish up my first month's homework for Ali Edwards One Little Word. I had put aside a bunch of card stock that I had, which I knew would last me the entire year but...... I couldn't resist using some of Rhonna's art from her "A year to follow your heart" kit.  I simply opened up the base pieces from Ali and then added some pieces from Rhonna's kit.  If you recall I did this same thing for my December Daily, which no I haven't finished that yet, ha!

I printed out the page on some textured Bazzill card stock then inked it with some Tim Holtz distressing inks.  Added a few things I had on hand, I'm trying to do my best to shop my current stash!  I love how the pieces turned out!  I'm hoping to get the protector pages at some point.  I have my LSS ordering them for me as I am being super cheap on shipping charges, ha!  That is another reason that creating Hybrid projects is great! You simply download your files so no shipping charges!

Here is what I created using PSE, Ali's January Files and Rhonna's Kit found HERE
Click on all photos to see them in a larger size.

Please note the file below is in a lower resolution as it is not a file to be shared. I'm merely sharing my process with you.
And once printed and trimmed to size I created the pieces shown in the collage below. Getting over the fact that I don't have beautiful girly handwritting is always hard but Ali encourages you to use your own handwritting. I even messed up a few spots on my journaling cards but just went with it. I have to continue to remind myself that this is for me and it doesn't have to be perfect or as beautiful as some of those shared by others.
Talk about easy, quick and fun! It didn't take me any time at all and so I plan on completing February's this week too!  Are you participating in One Little Word? If not click on the button on my right side bar to see more info via Ali's blog.

Thanks for stopping by!

p.s. I will finally have a couple of Valentine items posted later this week!

Sunday, July 17, 2011

Playing with Paper and Cardboard Boxes

Hello! Thanks for stopping in, today I want to share with you the 6x6 plaques that I created with some leftover MME's papers.  I've had these papers since last year, they were left over from a class I taught.  Back when I didn't know any better and I bought enough paper to kit 20 kits thinking that I would sell out my class, ha!  I sold quite a few kits but not all of them so finally putting the leftovers to use!

You can click on the photos to see them in a larger size.
Above you see both the plaque and the place card

Above is the back and front of place card

Side view of place card, showing cardboard box piece as base

Here you can see that the black cardstock was added to keep the cardboard from opening up too much. I created the piece with a crease in it so it would stand like an easel.

Here is the back of both pieces, the large cardboard easel is created using the die from Sizzix called small easel. That was tricky because it tends to cut too deep so I had to find the thickest cardboard scraps I had so that it wouldn't cut the creases too much.


Supplies Used For the 6x6 Art Piece
Printed Cardstock MeadowLark line by My Mind's Eye
The Sewing Room Die from Sizzix (Tim Holtz Alterations Line) for dressform
Small Easel Die from Sizzix (Tim Holtz Alterations Line)
Diamond Stickles for some added bling to the paper.
Say it in Crystals from Prima
Lady Face Stamp by dawn houser from Inkadinkado 
Stamp is True Friends F1189 Stampabilities 
Various texture folders from Sizzix
ek scalloped circle punch
tulle
crystal brad
Black cardboard box for dressform
Tim Holtz Distressing Ink Black Soot

Supplies Used for the Place cards
Printed cardstock is MeadowLark line by MME
Stampin Up Punch for shape for Name piece
ek scalloped circle punch
white tulle
ek scalloped edge punch
black cardstock
piece of Studio Calico cardboard box
Tim Holtz Distressing Ink Black Soot


Linking up to Get Your Craft On Tuesday over at...

Todays Creative Blog


Sunday, June 26, 2011

Creating with a friend

Is what I did this weekend while in Georgetown Texas!  My friend Leslie is so talented in paper crafting, photography and more!  I headed on a road trip Saturday and was so excited that I would not only be visiting Leslie but going to Archivers (her idea), creating, chatting and seeing her family while I was there! They are some of the sweetest people you could ever ask to meet!  I was sad to have to leave Sunday morning but wanted to get back to my sweet Love Bug ;)

I loved seeing how Leslie's thought process was when sitting down to create!  She starts out by sketching her ideas and then pulling the papers, inks, punches and embellishments she wants to work with.  Let me tell you this woman is a class act and is very careful to make it all look just right!  The funny thing is that some of it she does quickly without hesitating and it looks amazing.  Where as I will sit there for 5 minutes trying to place my letters or making sure that the swipe of the paint is just right.  I appreciate the time she took out in her weekend to help me create this piece that she designed!

Click on photos to see in a larger size
Please keep in mind that this was my first time sewing on paper, and using my new Copic Sketch Pens.  I have lots of practicing to do but she was a great teacher and I think it didn't turn out too bad ;)  

If you love this and want one for yourself or someone you know just go visit Leslie HERE and drop her a line.  She can customize it to what your little heart desires ;)  When you visit her blog you will see the piece that she created. She puts a lot of effort and pride into every piece of art that she creates!
Thanks for stopping in and hope you have a great week!!

Sunday, March 13, 2011

My Mind's Eye Decorates a Box

Wanted to share with you one of my last class projects that I taught at www.scrappnsavvy.com in February.  I'm going to simply post the photos and you can feel free to "scrap lift" the project but please be sure to call out my blog as credit to the design of the project should you use it as inspiration and blog about it.  I would simply like this so that folks will learn of my blog so that they can visit for more inspiration.

I used the same box that I used last February in this project HERE

Inside the box are 12 small mini album that can be used to journal a special memory, photo anything your heart desires.  I didn't include photos or journaling in my class sample as I felt that the students could easily come up with what the insides of their mini albums should look like.

You should be able to see photos in a larger size if you click on them :)


Another thing that we changed in class was the closure of the box, the store had THESE for sale and so I suggested they use this on top of the box and then add the ribbon loop on the box (where I have the button) and loop it over the knob to close it.  Sorry I don't have a photo as we did that in class and I didn't think to photograph it.

Papers used is from My Mind's Eye Lost & found, madison avenue lines found HERE
All the brad embellishments are from that same line.
Used Tim Holtz Journaling Tickets
Heart Doily found at the $1 section at Target
Used a Stampin Up Decorative shape punch for that adorable punched piece you see on most of the mini albums.

This box would look adorable in the new Stella & Rose line by My Mind's Eye and so I plan on making yet another one.  

Thanks for stopping by!


Thursday, December 4, 2008

Days 2 and 3 of 12 Days of Tags

Hello all! I say all as if I have a ton of visitors, lol, one can wish can't she? Anyhow, so first I want to share some fun news! My DH surprised me with the new Verizon Blackberry Storm this evening, he spoils me so! I think it was meant to be one of my Christmas presents but my DH can never wait to give me my gifts on the day of. While my new phone was charging I decided to work on the tags for day 2 and day 3 of Tim's 12 days of tags. I think they turned out OK, I had a little bit of trouble with the silver and so on my third try I decided to leave off the speckling he did on his. I want to buy the tool he used to do his, I used an old toothbrush and it sprayed way too much on it. So, the tag with the tree is from his day 2 and the one with the snowman is day 3. I don't have all the supplies he calls out so I made do with what I had. If you want to go see how his turned out click here. On day 3's tag he said to be sure to coat the back side of the acrylic oval completely before laying it on the image and I thought I had but when I pressed it some areas didn't seem to have enough coverage. What is cool about that tag is that he had us stamp the image on the tag with just black. Then stamped the same image on a second tag, it is on that tag that I added color then cut it out and placed it on top of the black image for the pop of color.
Well hope you have had a great week, it is almost over and then we get to continue the work on our house....oh joy.